Deploy ONLYOFFICE Documentserver
3.0 Enterprise Edition
OnlyOffice offers real-time collaboration with office documents in your browser. As soon as you open a file from SeaTable, OnlyOffice opens in a new browser tab and allows real time collaboration. As soon as the last user exits the document by closing his browser window, the document is saved back to the SeaTable base.
Access takes place via the public URL via HTTPS. So that OnlyOffice cannot be used by other systems, a shared secret in the form of a JWT key is used.
You have to decide: Collabora OR OnlyOffice
Collabora and OnlyOffice are both office editors. You have to decide which one you would like to use. You can not use both in parallel.
Use a separate host, if you expect many users
OnlyOffice can be installed on the same host as SeaTable Enterprise Edition. If OnlyOffice is used regularly and by many users, the host should be fitted with sufficient cores and RAM or you should move OnlyOffice to a separate host.
This article assumes that SeaTable Enterprise Edition is installed and is running.
Installation
Change the .env file
To install OnlyOffice, include onlyoffice.yml in the COMPOSE_FILE variable within your .env file. This instructs Docker to download the required images for OnlyOffice.
Simply copy and paste () the following code into your command line:
sed -i "s/COMPOSE_FILE='\(.*\)'/COMPOSE_FILE='\1,onlyoffice.yml'/" /opt/seatable-compose/.env
Generate JWT-Token (shared secret)
Secure communication between SeaTable and OnlyOffice is granted by a shared secret.
Copy and paste the following commands to generate the shared secret and write it at the end of the .env file:
echo -e "\n# OnlyOffice" >> /opt/seatable-compose/.env
echo "ONLYOFFICE_JWT_SECRET=$(pwgen -s 40 1)" >> /opt/seatable-compose/.env
Modify dtable_web_setings.py
Now execute the follwogin command to add the required configuration to dtable_web_settings.py.
source /opt/seatable-compose/.env
echo -e "\n# onlyoffice" >> /opt/seatable-server/seatable/conf/dtable_web_settings.py
echo "ENABLE_ONLYOFFICE = True" >> /opt/seatable-server/seatable/conf/dtable_web_settings.py
echo "ONLYOFFICE_APIJS_URL = 'https://${SEATABLE_SERVER_HOSTNAME}:6233/web-apps/apps/api/documents/api.js'" >> /opt/seatable-server/seatable/conf/dtable_web_settings.py
echo "ONLYOFFICE_FILE_EXTENSION = ('doc', 'docx', 'ppt', 'pptx', 'xls', 'xlsx', 'odt', 'fodt', 'odp', 'fodp', 'ods', 'fods', 'csv', 'ppsx', 'pps')" >> /opt/seatable-server/seatable/conf/dtable_web_settings.py
echo "ONLYOFFICE_JWT_SECRET = '${ONLYOFFICE_JWT_SECRET}'" >> /opt/seatable-server/seatable/conf/dtable_web_settings.py
Don't replace variables
You don't need to manually replace the variables ${SEATABLE_SERVER_HOSTNAME} and ${ONLYOFFICE_JWT_SECRET}. They will be automatically replaced as we have sourced the .env file.
Download onlyoffice and restart
One more step is necessary to download the OnlyOffice container and restart the SeaTable service.
cd /opt/seatable-compose
docker compose down
docker compose up -d
OnlyOffice takes some some minutes for the initial start. If you get an error message when clicking an office file in SeaTable, be patient and try again after one minute. Onlyoffice is ready, if a new browser window opens with your office document. Any user with access to this base can now open this document with OnlyOffice.
Check if installation is complete
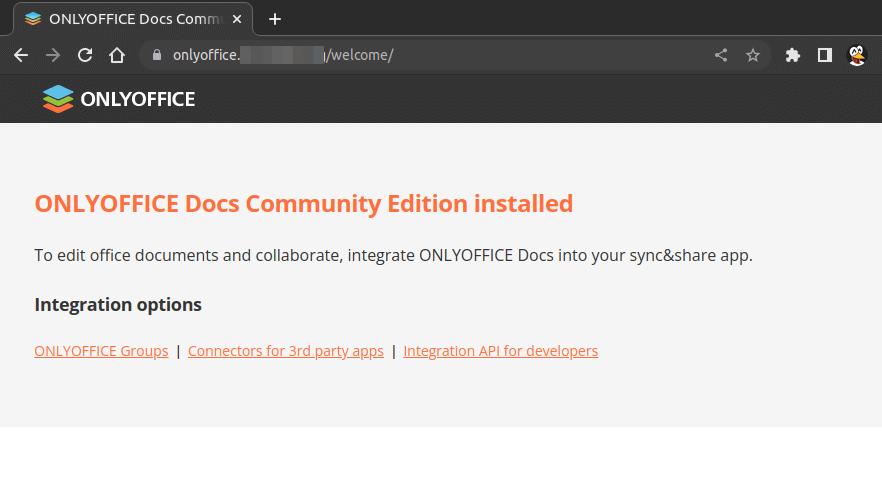
Try to open https://SEATABLE_SERVER_HOSTNAME:6233/welcome. You should see a welcome page like this.
If this does not happen, execute docker compose logs onlyoffice -f to get more details about the startup of OnlyOffice.
Advanced: Custom settings
The following configuration options are only for OnlyOffice experts. You can create and mount a custom configuration file called local-production-linux.json to force some settings.
Create a configuration file in the newly created directory:
cd /opt/onlyoffice
nano local-production-linux.json
Copy the following code block in this file:
{
  "services": {
    "CoAuthoring": {
      "autoAssembly": {
        "enable": true,
        "interval": "5m"
      }
    }
  },
  "FileConverter": {
    "converter": {
      "downloadAttemptMaxCount": 3
    }
  }
}
Mount this config file into your onlyoffice block in your docker-compose.yml.
  volumes:
      - /opt/onlyoffice/logs:/var/log/onlyoffice
      - /opt/onlyoffice/data:/var/www/onlyoffice/Data
      - /opt/onlyoffice/lib:/var/lib/onlyoffice
      - /opt/oods/DocumentServer/local-production-linux.json:/etc/onlyoffice/documentserver/local-production-linux.json
Restart OnlyOffice to load the new configuration.
docker compose up -d
Advanced: OnlyOffice on a separate host and URL
It is not that difficult to install OnlyOffice on a separate host to free the ressources of the main server. This manual assumes that onlyoffice will be accessable by a separate public availabe URL.
Install OnlyOffice
Start with the installation of docker and docker compose like it is described in the installation manual of SeaTable Server.
This is how your .env file should look like:
COMPOSE_FILE='caddy.yml,onlyoffice.yml'
COMPOSE_PATH_SEPARATOR=','

# onlyoffice url
SEATABLE_SERVER_HOSTNAME=<onlyoffice-url>
ONLYOFFICE_PORT=443

ONLYOFFICE_JWT_ENABLED=true
ONLYOFFICE_JWT_SECRET=<any shared secret>
Now execute docker-compose up -d and on this server only caddy and OnlyOffice will be installed. Verify that OnlyOffice is reachable by opening your browser and open https://<onlyoffice-url>/welcome/.
Configure SeaTable to use this new OnlyOffice host.
The next step is to tell SeaTable where it can access OnlyOffice. Update the settings in dtable_web_settings.py accordingly. Make sure to use the excact same shared secret and use the public available URL of the OnlyOffice server.
In addition you have to extend the caddy security headers. Add the URL of your Onlyoffice host to the variables script-src-elem and frame-src in your custom-seatable-server.yml. Don't forget to restart all containers.